(OnePlus Devices)Since the inception of OnePlus releases, the company has consistently held its position in the smartphone industry. Each smartphone launch is accompanied by a plethora of features and innovative additions, providing users with the best Stock Android-like experience.

OnePlus devices boast a combination of top-notch display quality, camera performance, durable build, appealing design, and ample battery capacity, catering to the diverse desires of its customer base. Similar to other smartphones, OnePlus incorporates built-in Factory Reset Protection (FRP). Occasionally, users may forget their Google Account credentials and screen lock details. In such cases, bypassing FRP becomes necessary to regain access to their OnePlus devices and resume normal usage.

To assist you in resolving your issues, we offer a step-by-step process to guide you through the FRP Bypass for your OnePlus devices.

FRP Bypass for OnePlus Devices: Step-By-Step Guide

If you’re seeking a method to perform FRP Bypass on your OnePlus smartphone without using a computer or PC, there’s no need to worry. We’ve got you covered with a step-by-step guide to help you navigate through the process and resolve your issue. Simply ensure to follow the provided steps carefully to successfully unlock the FRP on your device.

  1. To begin, choose your preferred language and region from the screen that appears on your phone after performing a factory reset.

FRP Bypass for OnePlus Devices

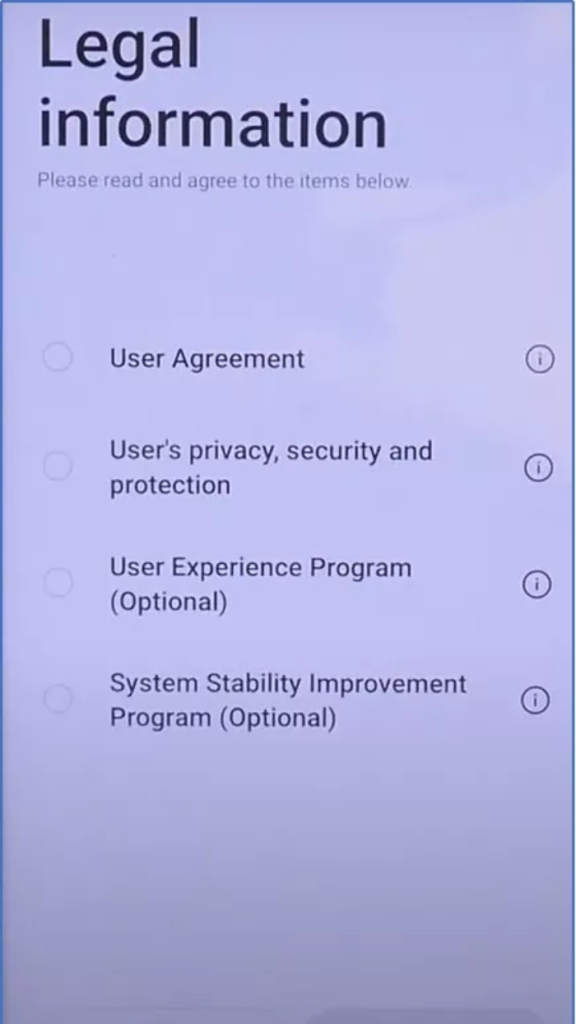
2. Proceed by checking the first two essential options, namely the User Agreement and the User’s privacy, security, and protection. Afterward, click on Next.

FRP Bypass for OnePlus Devices

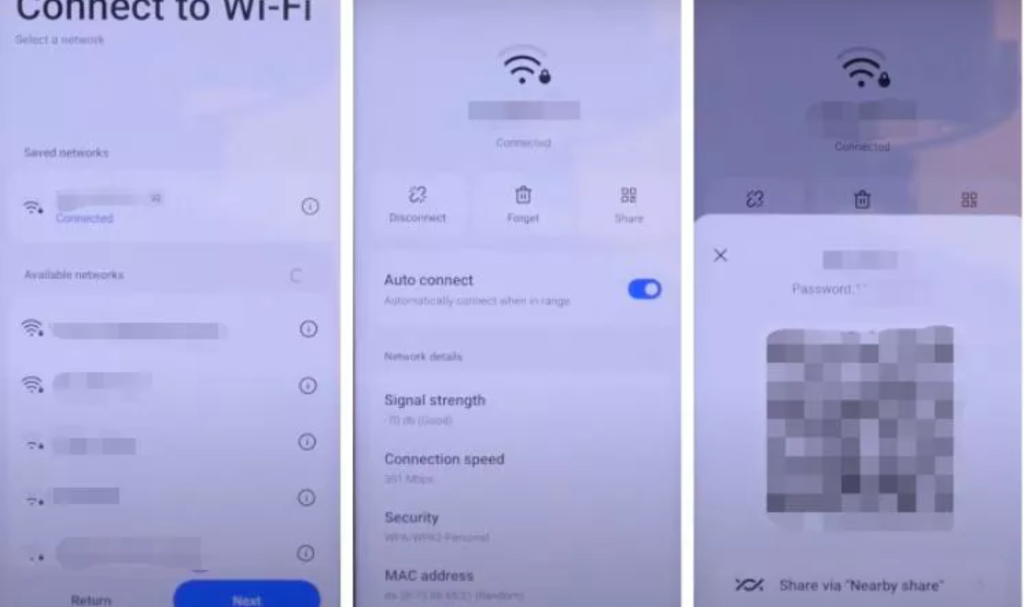
3. On the following screen, you will be prompted to connect to Wi-Fi. Establish the connection and patiently wait for the “Getting your phone ready…” screen to complete.

4. Now return to Connect to the Wi-Fi screen. Next to the wi-fi connection, your phone is connected to tap on the small circled “i” to enter the About this network menu. Look for the Share icon and tap it. A dialogue box with a QR code will appear on the screen. Under the QR code, tap on Share via “Nearby share”.

FRP Bypass for OnePlus Devices

5: Activate Nearby Share on your phone when prompted. This initiates a search for nearby devices to share Wi-Fi.
The primary goal, however, is not to share Wi-Fi. Instead, find the small text labeled “Need help sharing?” accompanied by a circled “i,” and tap on it.
FRP Bypass for OnePlus Devices

6. Open the sharing help menu by tapping on the three vertically aligned dots situated in the top-right corner of your phone screen. Upon tapping, a list will appear. From this list, select the “Share article” option.

FRP Bypass for OnePlus Devices

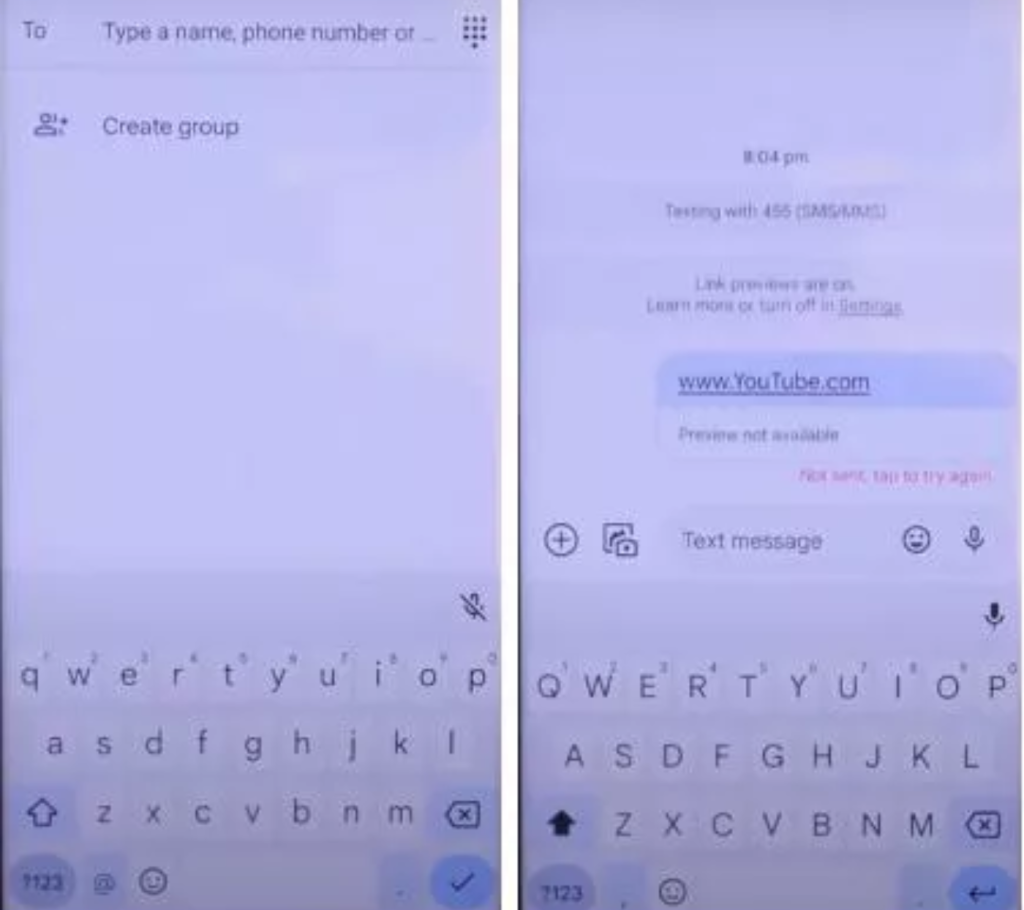
7. To reach the YouTube app on your phone via an unsent text message, follow these steps: Open the messaging dialogue box and choose “New message.” Enter any fictitious number in the “To” section. In the text message box, replace the current URL with www.youtube.com. Press the send button; as the contact number is invalid, the message won’t be sent. The main goal is not to send the message but to tap on the YouTube URL within the unsent text message, prompting the YouTube app to open on your phone.

FRP Bypass for OnePlus Devices

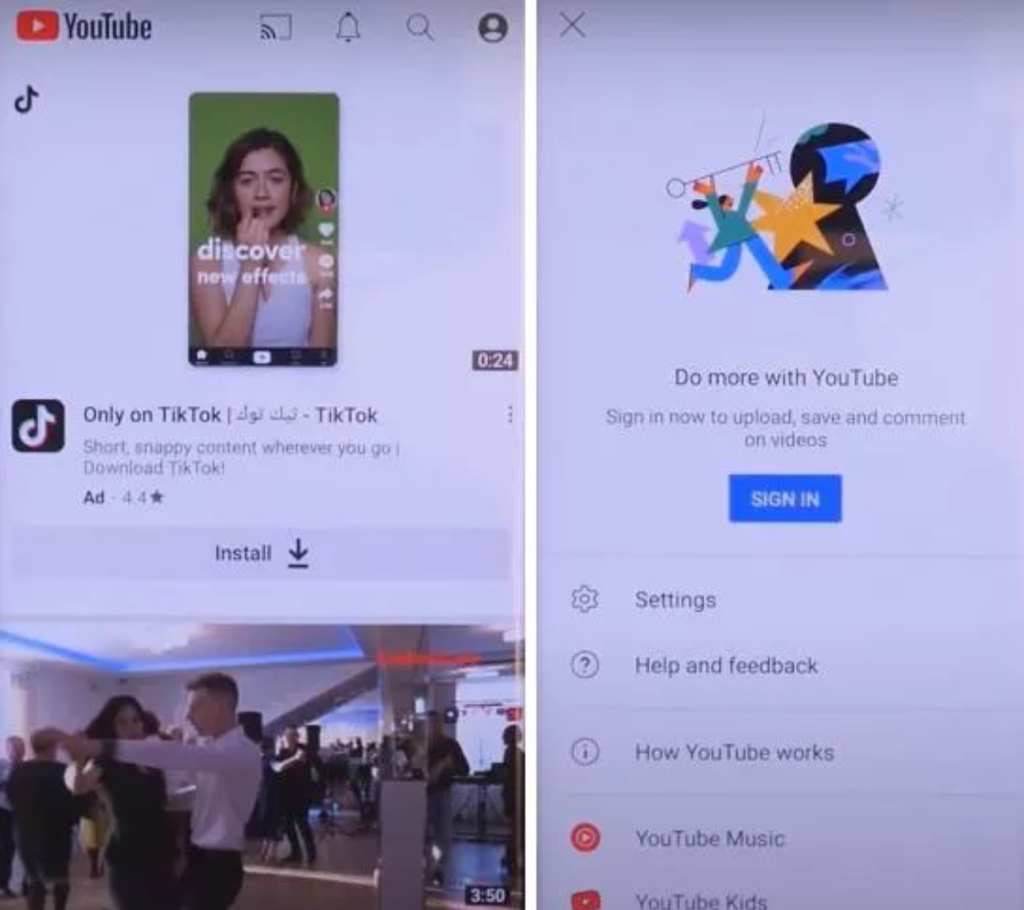
8. After opening YouTube, tap the circular user profile icon located in the top-right corner of the screen. Within the profile icon, choose “Settings.”

FRP Bypass for OnePlus Devices

Navigate to Settings and select About. From there, click on Google Privacy Policy in the subsequent screen. This action will launch Google Chrome.

10. While using Google Chrome, tap on Accept & continue. On the following screen, you’ll be prompted to Turn on Sync – choose No, thanks. Subsequently, another dialogue box for Chrome notifications will emerge – once again, opt for No, thanks.

11. In the web address bar, delete the Google Privacy Policy URL and instead input “vnrom. site/bypass,” then press enter.

12. After the website loads, scroll down until you locate the Google “G” logo accompanied by the text “Google Quick Search Box.” Tap on it.

13. On the Google search page, click the microphone icon situated in the Google search bar, and vocalize the command, “Open clone phone.” Proceed to tap Allow for each dialogue box that appears.

14. After completing the dialogue boxes, the Clone Phone app will present two options. Select the red option with the text “This is the new device” by tapping on it.

15. For the next steps, you’ll need a second phone. Once you’ve chosen “This is the new device” on your primary device, the following screen will prompt you to select the brand of the device from which you intend to migrate data. Make the relevant selection and a QR code will be generated on the screen. This QR code streamlines the data migration process, facilitating a smooth transfer of information between the two devices.

16. On the second device, open the Google Play Store, search for the “Clone Phone OnePlus app,” and proceed to download it.

17. On the second phone, open the Clone Phone – OnePlus app, and choose “Agree and continue.” Following this, a series of dialogue boxes will appear, each seeking various permissions. For each dialogue, click on “Settings,” and within the Settings, activate the necessary permissions by toggling them on. This ensures that the Clone Phone app has the essential permissions to smoothly facilitate the data cloning process.

18. Afterward, click on “Start migration” within the app. When the dialogue box “Turn on ‘Display over other apps'” appears, select “Settings.” A list of apps will be displayed; opt for the Clone Phone app. Then, toggle on the permissions for each subsequent dialogue box, ensuring that the “Display over other apps” feature is activated. This step is vital for ensuring the seamless functioning of the migration process.

19. Once the phones are connected, proceed to initiate the data migration process. On the secondary phone, deselect the list of apps presented and opt for only a standard app, such as Calculator. Tap “Start migration” to commence the data transfer.

20. Once the phones are connected, proceed to initiate the data migration process. On the secondary phone, deselect the list of apps presented and opt for only a standard app, such as Calculator. Tap “Start migration” to commence the data transfer.

21. Upon the completion of data migration, proceed with setting up your phone. Choose your preferred navigation method and tap “Next.” When prompted for the Unlock method, select “Later,” and then click “Done” to start using your phone.

At this juncture, we highly recommend performing a factory reset on your phone. Navigate to Settings > Additional Settings > Back up and reset > Reset phone > Erase all data > Then select Erase data. Following the factory reset, you can proceed to set up your phone in the usual manner. Congratulations, you have completed the OnePlus Nord FRP bypass without the need for a PC.

FAQs About FRP Bypass for OnePlus Devices:

If I Forgot my Google Account credentials can I use my phone again?

Certainly, adhere to the provided procedure to bypass FRP (Factory Reset Protection) on your OnePlus device effortlessly, even without prior experience.

Can I perform FRP Bypass without a PC?

The steps outlined on this webpage are designed for FRP bypass without the need for a personal computer.

Do I lose my data while Bypassing FRP?

Indeed, it is recommended to safeguard your crucial data by creating a backup. 

which model does this method support?

Utilizing this software, you can successfully bypass FRP on all OnePlus devices. 

Conclusion:

If you’re seeking a method for FRP bypass on your OnePlus device, congratulations! You’ve come to the right page. Simply follow the provided steps to fulfill your goal of unlocking your Android device. No need to worry if you don’t have access to a PC or computer, as this process doesn’t require one. So, fasten your seatbelt and navigate through the procedure.

Leave a reply

Your email address will not be published. Required fields are marked *

You may also like