Stock ROM For Sony Xperia E4g (E2003/E2006/E2053)
In the dynamic world of smartphones, understanding the significance of the Stock ROM for Sony Xperia E4g (E2003/E2006/E2053) can be a game-changer. Let’s delve into the realm of Stock ROM and explore why it holds the key to unlocking the full potential of your Xperia device.
What is Stock ROM and Why Does It Matter?
Before we unravel the specifics, let’s establish a foundational understanding of what Stock ROM entails. In essence, Stock ROM refers to the official operating system that comes pre-installed on your device straight from the manufacturer – in this case, Sony.
Now, why should you care about it? The answer lies in the seamless integration of hardware and software. Stock ROM is tailored to complement the unique features of your Xperia E4g, ensuring optimal performance, stability, and compatibility. It’s the blueprint designed to harmonize the symphony of your device’s components.
The Advantages of Opting for Stock ROM
- Enhanced Stability and Reliability:
- With Stock ROM, your Xperia E4g operates on a system specifically crafted for its hardware. This synergy minimizes glitches and ensures a smoother user experience.
- Optimized Performance:
- The harmony between Stock ROM and your device’s hardware translates to improved speed and efficiency. Say goodbye to lags and hello to a responsive interface.
- Regular Updates and Security Patches:
- Staying up-to-date is crucial in the ever-evolving tech landscape. Stock ROM ensures timely access to official updates and security patches, safeguarding your Xperia E4g against potential vulnerabilities.
- Preservation of Warranty:
- Installing custom ROMs may void your device warranty. By sticking to Stock ROM, you not only ensure optimal performance but also retain the safety net of your warranty.
How to Install Stock ROM on Sony Xperia E4g
Now that the advantages have piqued your interest, let’s walk through the steps of installing Stock ROM on your Sony Xperia E4g.
- Backup Your Data:
- Before diving into the installation process, safeguard your important data by creating a comprehensive backup. This ensures that no precious files are lost during the transition.
- Download the Official Stock ROM:
- Head to Sony’s official website or a trusted source to download the Stock ROM file compatible with your Xperia E4g model (E2003/E2006/E2053).
- Enable USB Debugging:
- Access your device’s developer options and enable USB debugging. This step is crucial for establishing a stable connection between your Xperia E4g and the computer.
- Install Flashing Tool:
- Download and install a reliable flashing tool such as Flashtool or Xperia Flash Tool on your computer. These tools serve as the bridge for installing the Stock ROM on your device.
- Connect and Flash:
- Connect your Xperia E4g to the computer using a USB cable. Launch the flashing tool and follow the on-screen instructions to flash the Stock ROM onto your device.
- Reboot and Enjoy:
- Once the flashing process is complete, reboot your Xperia E4g. Revel in the optimized performance and stability that Stock ROM brings to the table.
Conclusion:
In a world inundated with customization options, embracing the Stock ROM for your Sony Xperia E4g is a strategic decision. It’s the gateway to a harmonious blend of hardware and software, ensuring your device operates at its peak potential.
By understanding the advantages and following the installation steps, you’re not just upgrading your operating system; you’re elevating your entire smartphone experience. Embrace the power of Stock ROM and witness your Xperia E4g shine like never before.
Download:
D2306
- E2053_25.0.A.2.35-R8A_Personal-AR.ftf | OneDrive | GD2
- E2053_25.0.A.2.14-R6A_Orange-DO.ftf | OneDrive | GD2
- E2053_25.0.A.1.28-R1A_Service-Exchange-Unit.ftf | OneDrive | GD2
D2305
- E2006_25.0.A.2.35-R10A_Movistar-MX.ftf | OneDrive | GD2
- E2006_25.0.A.2.35_R4A_CustomizedGEL.ftf | OneDrive | GD2
- E2006_25.0.A.2.31-R7A_Nextel-PE.ftf | OneDrive | GD2
- E2006_25.0.A.2.14-R1A_Commercial-and-Journalists.ftf | OneDrive | GD2
- E2006_25.0.A.1.28_R1A_Unit.ftf | OneDrive | GD2
D2303
- E2003_25.0.A.2.35-R3A_Customized-CH.ftf | OneDrive | GD2
- E2003_25.0.A.2.35-R15A_Orange-FR.ftf | OneDrive | GD2
- E2003_25.0.A.2.31_R10A_CustomizedUK.ftf | OneDrive | GD2
- E2003_25.0.A.2.14-R5A_Vodafone-PT.ftf | OneDrive | GD2
- E2003_25.0.A.1.28-R1A_Service Exchange Unit.ftf | OneDrive | GD2
Flashing instructions:
(1). Download and install Sony Xperia USB Driver on the computer. If in case Xperia Drivers are already installed, then SKIP this step.

(2). Download and extract Sony Xperia Firmware on the computer. After extracting the firmware, you will be able to get similar files (with .ftf extension):

(3). Download and install Sony Xperia Flash Tool on the computer. If in case Xperia Flash Tool is already installed, then SKIP this step.
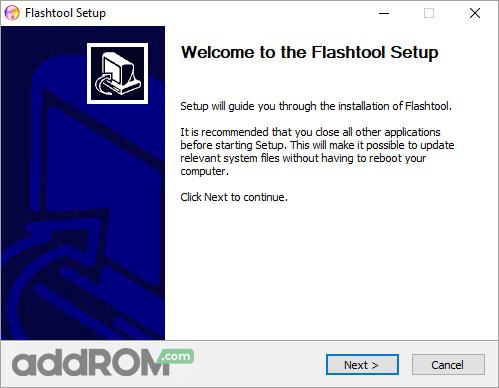
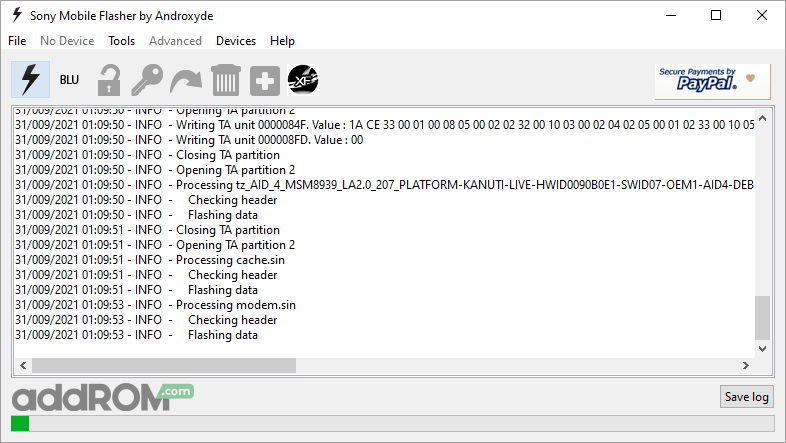
(4). Once Sony Xperia Flash Tool is installed, Launch it from the Desktop Shortcut or from the Start Menu. Alternatively, you can also launch the Flash Tool from the C:\Flashtool\ folder.
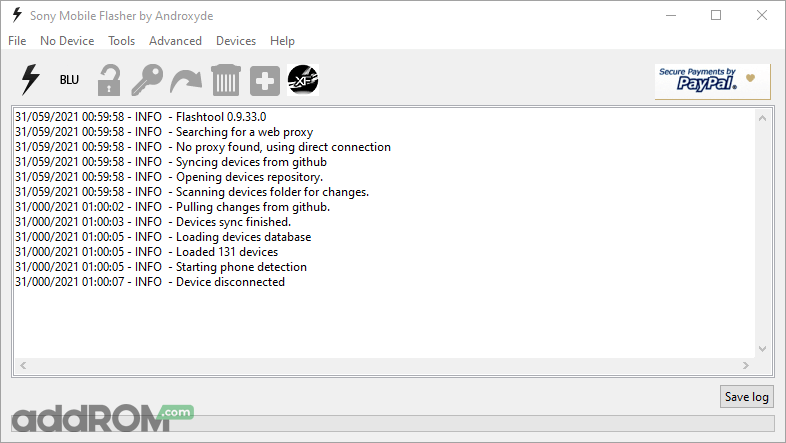
(5). Once Sony Xperia Flashtool is launched, you will be able to see the following screen:
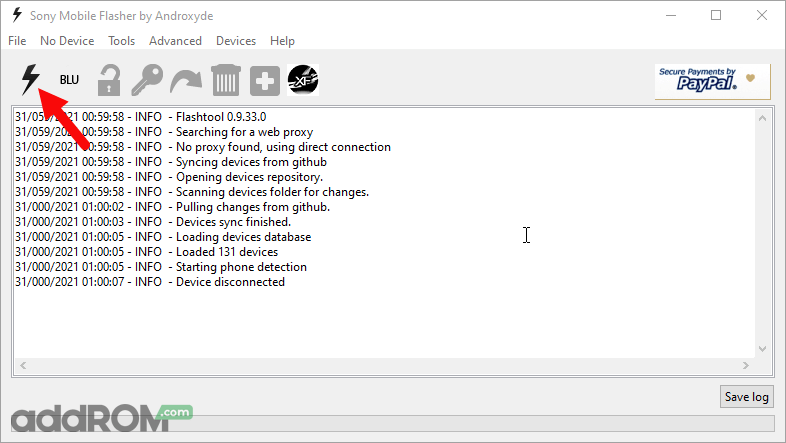
(6). Click on the Flash Button.
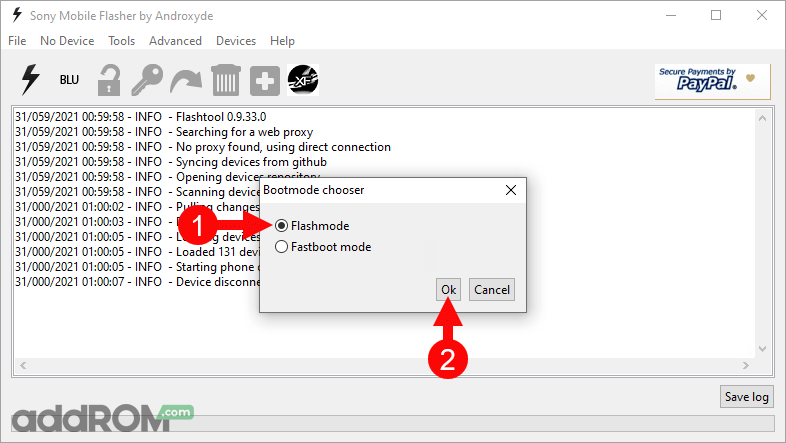
(7). Now, you will be able to see the Bootmode Choose Dialog Box. Select Flashboot option and Click on OK button.
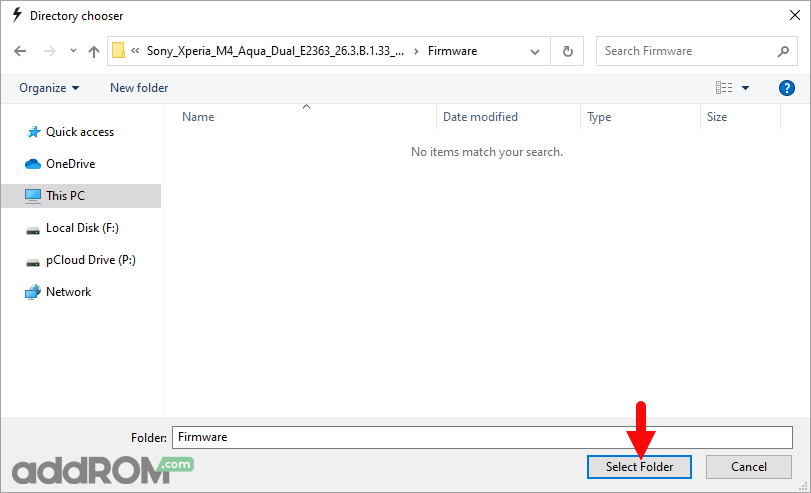
(8). Load the downloaded Xperia Firmware (.ftf) in the flashtool by clicking on the Browse Button.
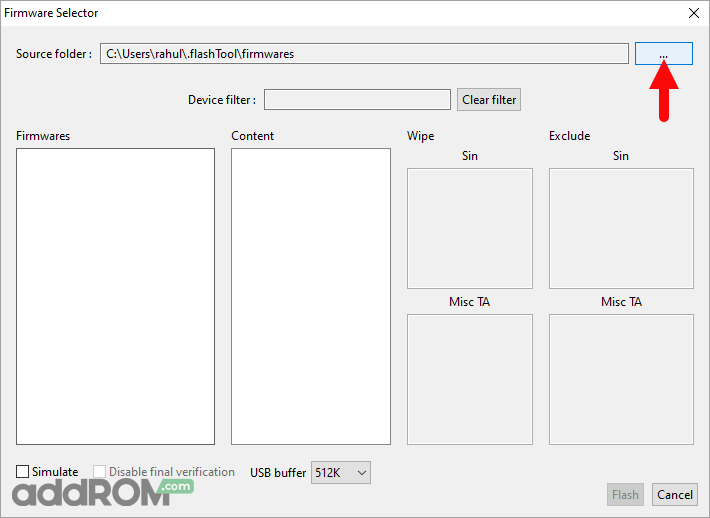
Locate and Select the Firmware Folder:
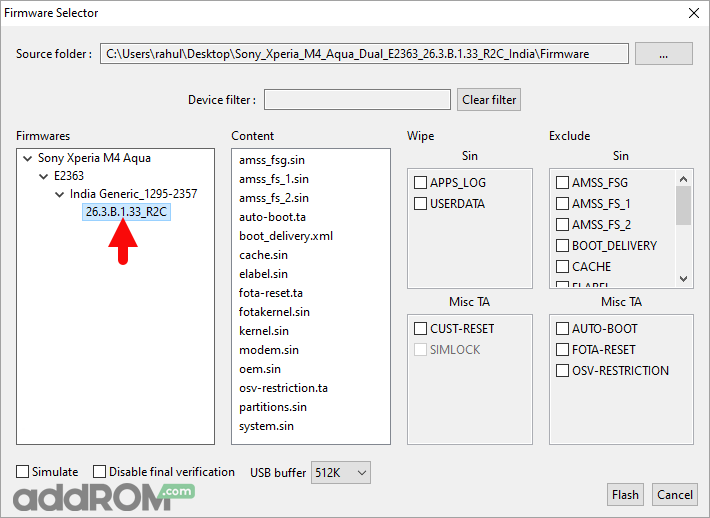
(9). Once the Firmware is Loaded in the Flash Tool, Select the Firmware version using the dropdown button.
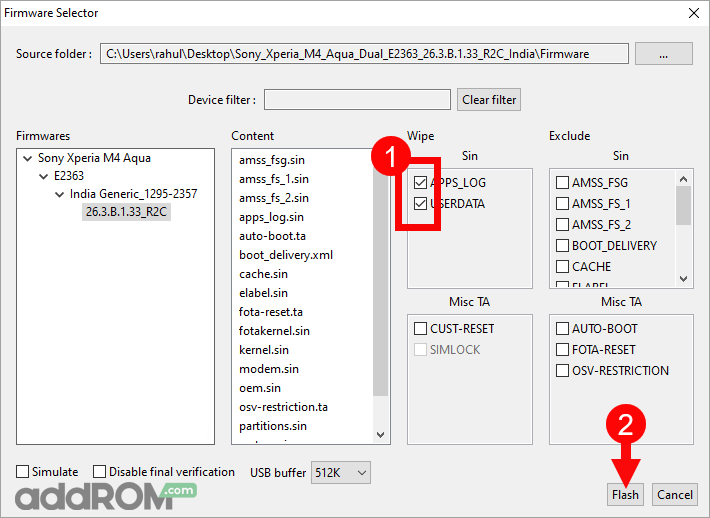
Select all the Checkbox under Wipe area and Click on the Flash button to begin the flashing process:
(10). Power off the Xperia Device > Press and Hold Volume Down button and connect the device to the computer using the USB cable.

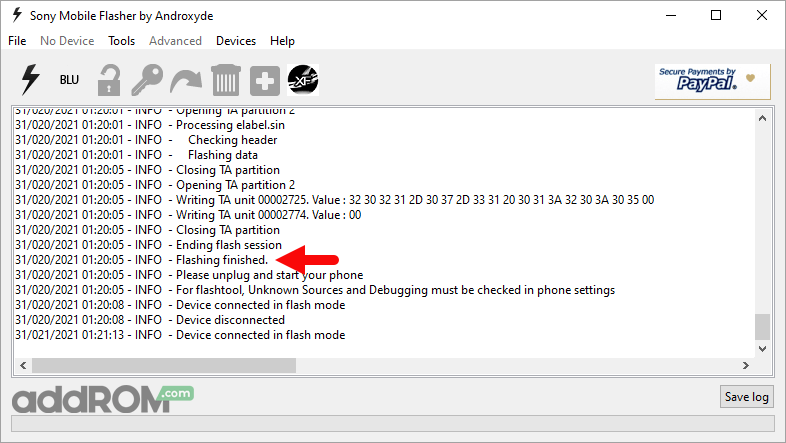
(11). Once the device is successfully connected to the computer, flashing will begin and will take 5-10 minutes to complete.
(12). Once the flashing process is completed, disconnect your device from the computer and turn it On.