How to install official stock rom on Vivo X9s Plus (PD1635)

Title: Unveiling the Magic: A Simple Guide to Installing Official Stock ROM on Vivo X9s Plus (PD1635)
Introduction: Your Vivo X9s Plus (PD1635) is not just a device; it’s a portal to a world of possibilities. To ensure it functions at its best, understanding how to install the official Stock ROM is essential. In this guide, we’ll take you through the process step by step, making it as easy as a breeze on a sunny day.
Section 1: Deciphering the Stock ROM Secret
- Cracking the Code: What is Stock ROM?
- Stock ROM, often referred to as Stock Firmware, is the secret sauce that comes pre-installed on your Vivo X9s Plus (PD1635). It’s the original operating system provided by the manufacturer.
- The Power of Stock ROM: Ensuring Device Harmony
- Stock ROM ensures device harmony, acting as the maestro orchestrating your Vivo X9s Plus. It dictates how the device operates, maintaining stability and performance.
Section 2: Why Stock ROM is the Hero in the Story
- Optimal Performance: Unleashing True Potential
- Installing the official Stock ROM unleashes the true potential of your Vivo X9s Plus. It ensures optimal performance, making your device responsive and seamless in operation.
- Security Guardian: Shielding Against Digital Perils
- Stock ROM acts as a security guardian, shielding your Vivo X9s Plus from digital perils. It provides a secure environment for your data and online activities.
Section 3: Preparing for the Stock ROM Journey
- Data Backup Ritual: Safeguarding Digital Memories
- Before embarking on the Stock ROM installation journey, perform a data backup ritual. Safeguard your photos, contacts, and cherished memories to ensure they remain intact.
- Battery Charm: Ensuring an Uninterrupted Ritual
- Cast a battery charm to ensure your Vivo X9s Plus is sufficiently charged or connected to a power source. This charm guarantees an uninterrupted ritual throughout the Stock ROM installation process.
Section 4: Step-by-Step Guide to the Stock ROM Ritual on Vivo X9s Plus
- Visit the Vivo Portal: Your Starting Point
- Begin your ritual by visiting the official Vivo portal. Navigate to the Stock ROM section and download the celestial firmware designed for your Vivo X9s Plus (PD1635).
- Downloading the Stock Elixir: Precision in Potion Crafting
- Download the sacred Stock ROM elixir with precision. Ensure it aligns with the model and region of your Vivo X9s Plus to avoid compatibility hiccups during the potion crafting process.
- Device Connection Incantation: Establishing a Mystic Link
- Use a USB wand to create a mystic link between your Vivo X9s Plus and your computer. This connection is vital for transferring the Stock ROM elixir and initiating the magical installation process.
- Launching the Flash Spellbook: Master of Transformation
- Open the Flash Spellbook (Flash Tool) on your computer. Load the downloaded Stock ROM elixir and configure the spellbook to match the specifications of your Vivo X9s Plus.
- Initiating Flashing Ritual: Witnessing the Magic Unfold
- Begin the flashing ritual by pressing the “Start” incantation in the spellbook. Observe as your Vivo X9s Plus undergoes a transformation, with the newly installed Stock ROM taking center stage.
- Completion and Device Reawakening: Celebrating Ritual Success
- Once the flashing ritual is complete, disconnect your device and celebrate the success as your Vivo X9s Plus reawakens with the magic of the freshly installed official Stock Firmware.
Conclusion: Embracing the Magic Within Your Vivo
Congratulations! You’ve successfully completed the ritual of installing the official Stock ROM on your Vivo X9s Plus (PD1635). Your device is now empowered with optimal performance, security, and reliability. Remember, this process is like casting a spell to rejuvenate your phone, ensuring it continues to serve you well. Happy exploring in the magical world of Vivo!
Note: The information provided in this article is based on general knowledge and may not cover specific details or updates related to the Vivo X9s Plus (PD1635). Always refer to the official documentation and support for your device for the most accurate and up-to-date instructions.
DOWNLOAD:
HOW TO UPDATE:
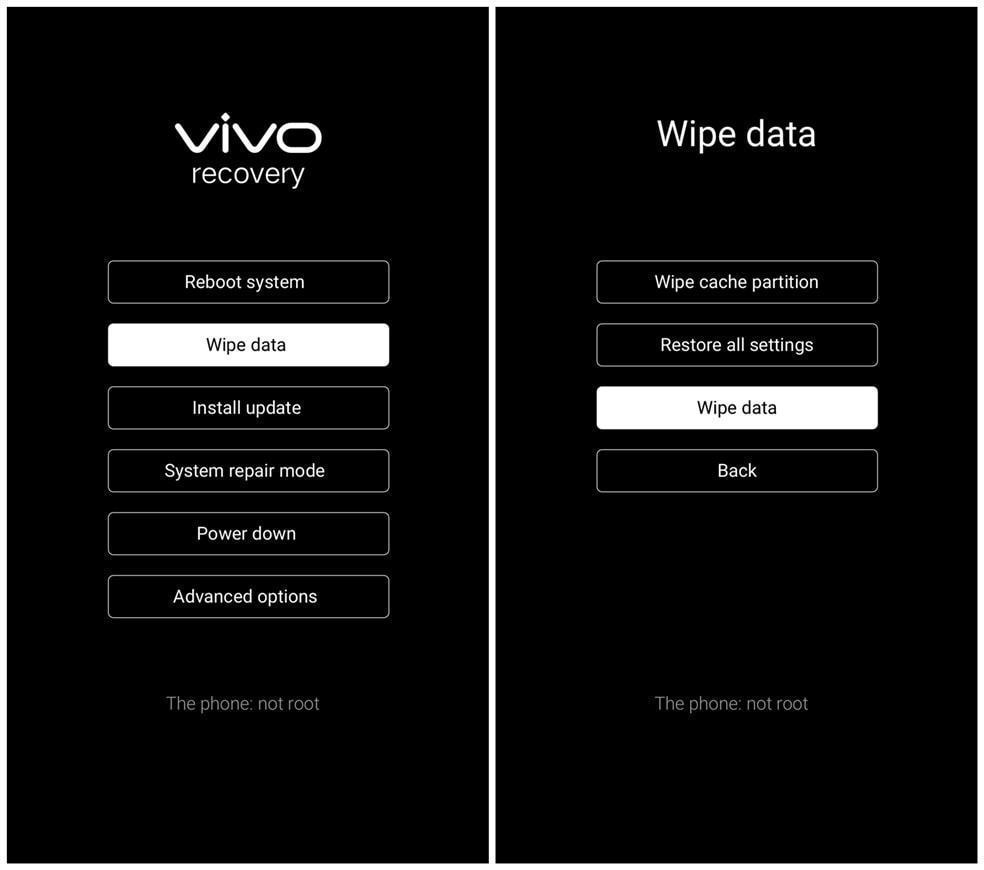
1. Perform Wipe data on your phone
a. Power off your phone, then press and hold Power button and Volume up button simultaneously until Vivo logo appears to enter Fastboot mode. Select Recovery mode by pressing Volume down button and enter it by pressing Power button;

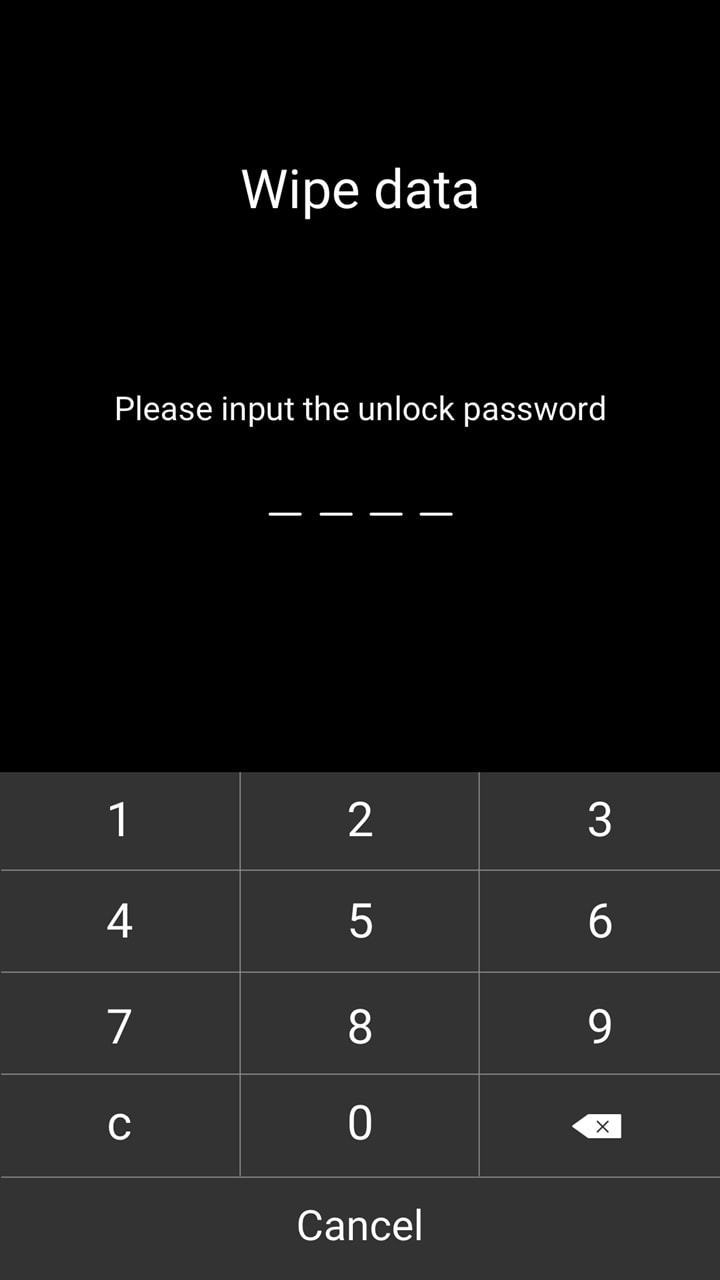
b. Touch Wipe data>Wipe data>enter the lock screen password. Then select Reboot system to reboot your phone.
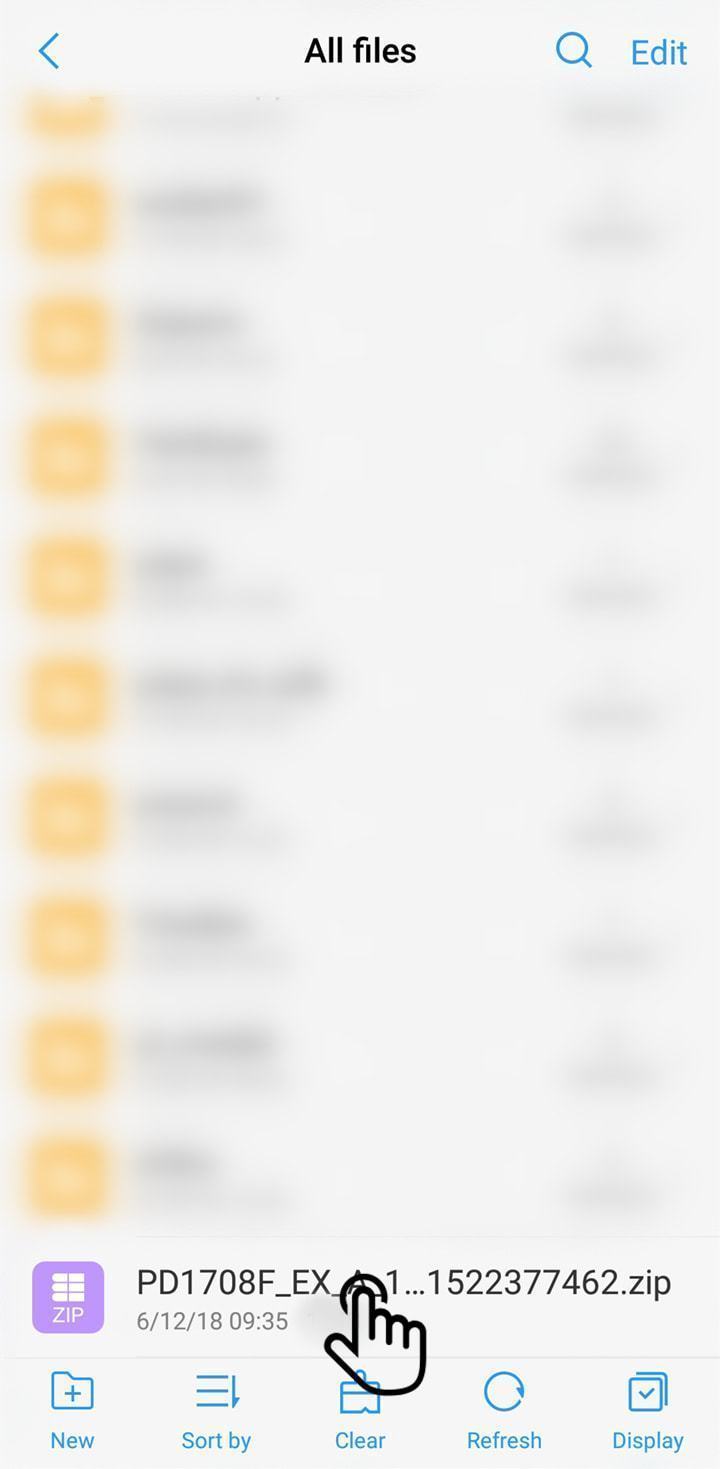
2. Download the corresponding firmware for your phone;
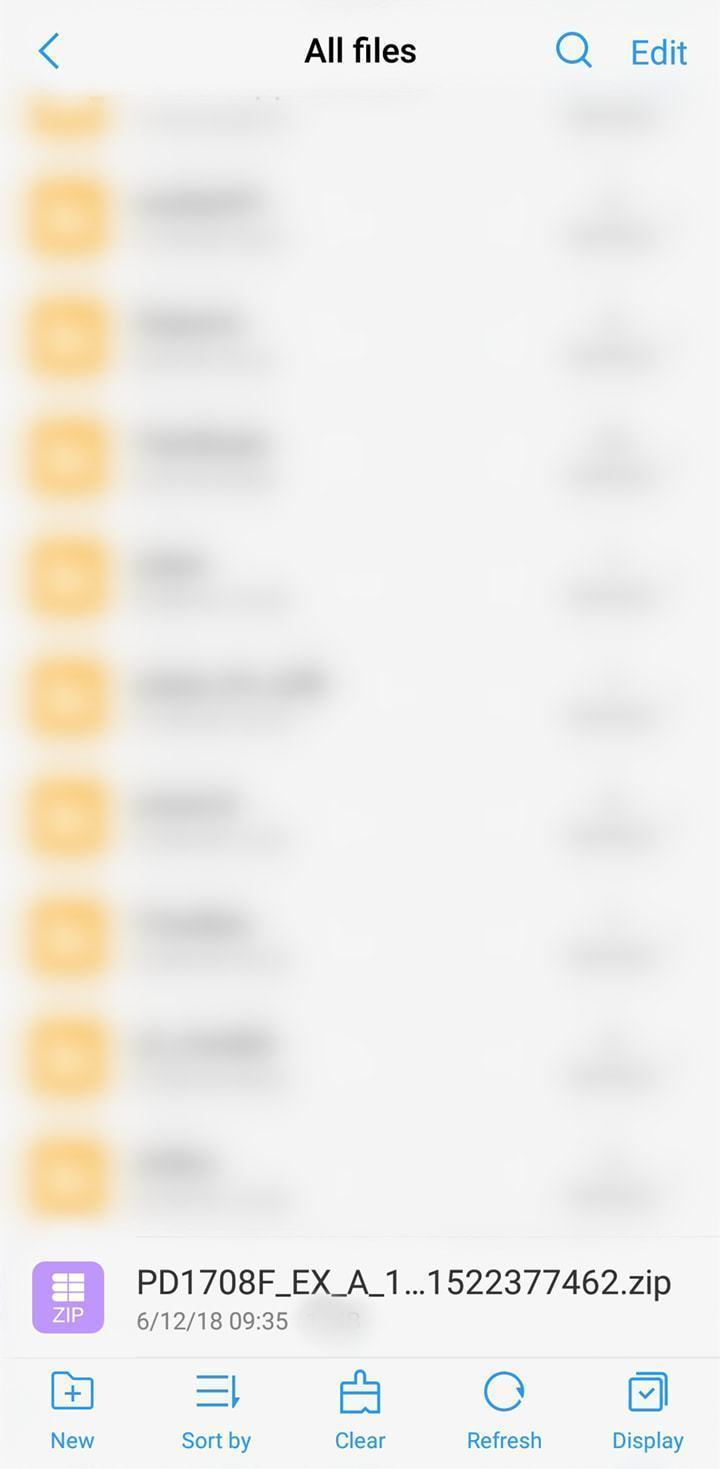
3. Move it to the root directory of your phone storage or SD card without decompressing;
Note: The root directory is basically the first thing you see when you open a file explorer on your phone. In other words, do not put the file in a folder. The files which you can find in Phone storage interface of File Manager locate the root directory.
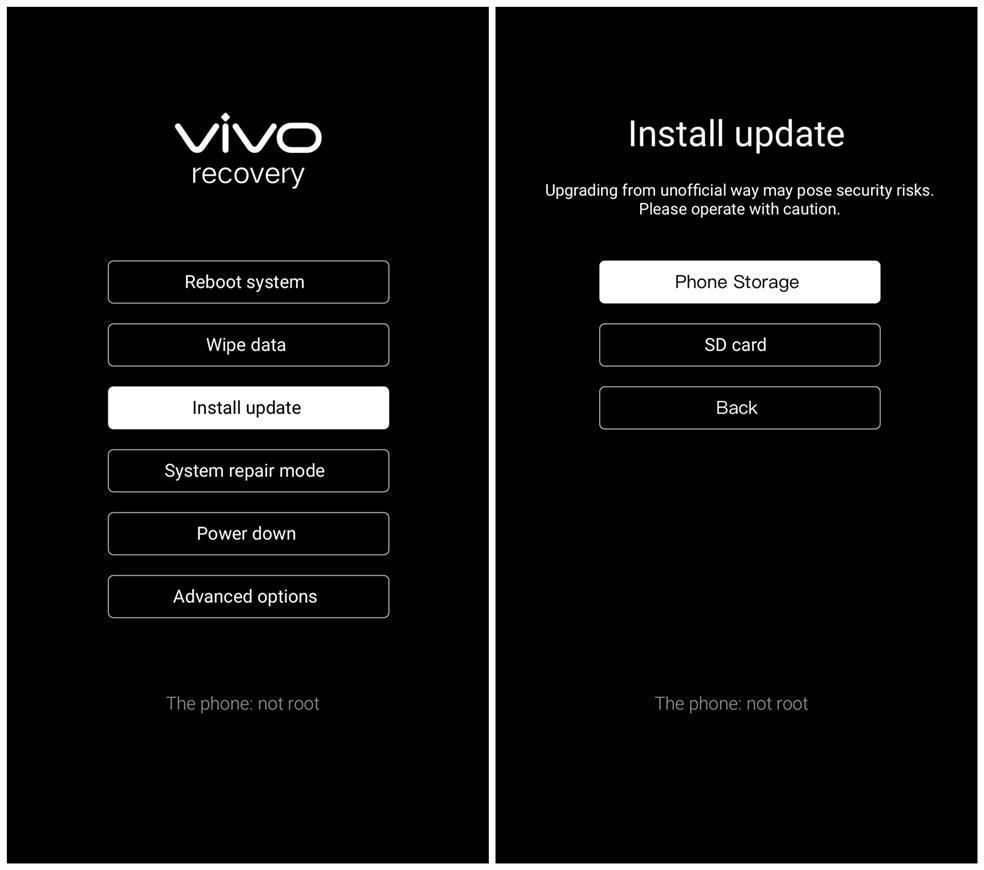
4. Install the firmware:
If you can enter your phone, click the firmware in File Manager to install it.
If you cannot enter your phone, follow the above steps to enter Recovery mode, then select Install update>Phone Storage or SD card>select the firmware>touch Next to install it.